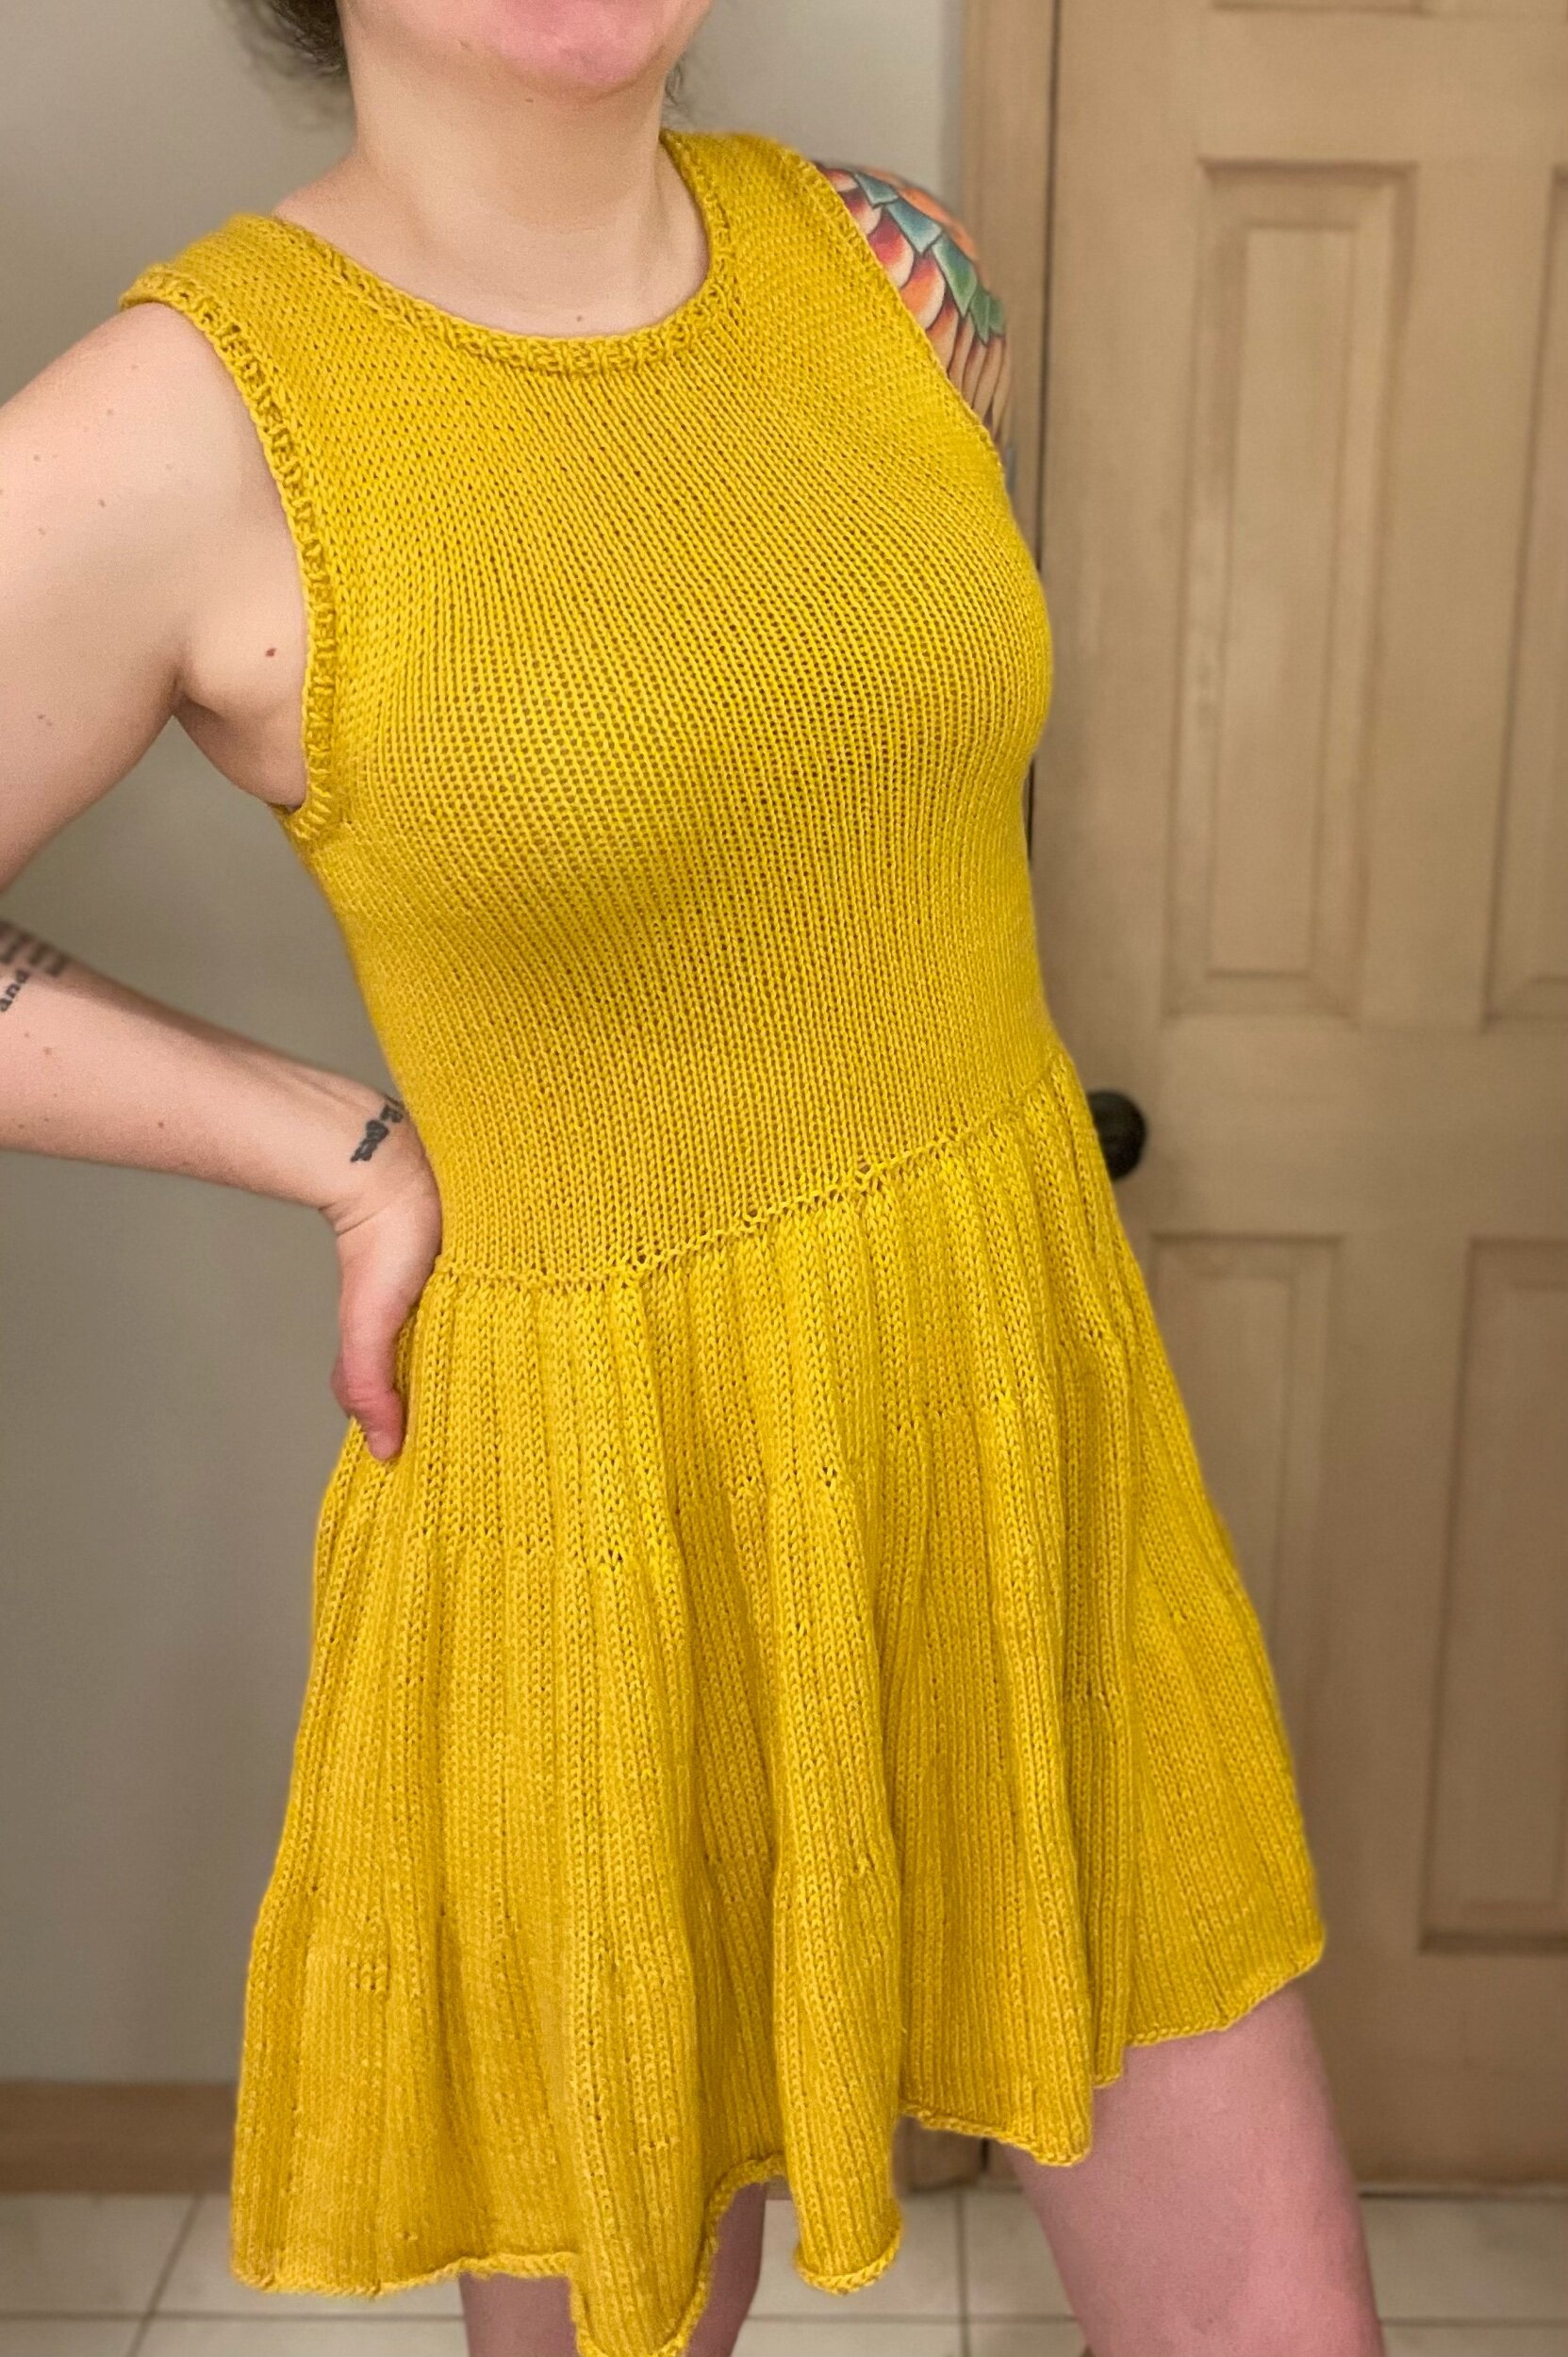
The Del Rey Dress
On May 17, 2020 I started knitting a dress. Exactly one year later, I’ve finally finished her! This one has truly been a labor of love. The WIP has been 80% complete since August of last year. I think I think the skirt so fast that I just got a little burned out and couldn’t finish (even though the majority of the work was behind me).
So here is a little about this project to celebrate! I decided to modify an existing peplum top pattern from Jane Tsou (aka Gorilla Knits) because I loved the fit of the top and wanted to see what it would be like as a flirty dress. The Del Rey Peplum Tank is on Ravelry and Etsy. The majority of my modifications took place in the cast on and once the skirt was completed I just joined up with the existing pattern to finish the top.
I have posted and shared the details of my modifications on Ravelry, but I want to share them here as well for those who are unable to use Ravelry at this time. You will need the Del Rey Peplum Top Pattern in order to follow the modifications.
Dress Modification Notes:
The modification for this dress all comes in the cast-on number and then decreases. The “pleats” are really 5x1 ribbing, so my modifications were to make the pleats wider at cast on and then I completed two decrease rounds. I knew that I wanted my pleats to start as 9x1 ribs. To find your cast-on number you’ll take the cast-on amount for your size and divide it by 6. This will tell you how many total ‘pleats’ you have. You’ll then take that number and multiply it by 10. That will give you your total cast on number (yes it’s a massive number for cast on!
To create the shaping I measured the distance from my waist to where I wanted the dress to fall on my body to find my total skirt length. I knew that I needed to get myself from a 9x1 rib down to a 5x1 rib which meant I would be doing 2 decrease rounds to “meet up” with the pattern again. I placed these decrease rounds evenly spaced on the skirt by dividing my total desired skirt length by 3- that number is how long you knit for before you decrease.
My decrease rounds looked liked “*ssk, k5, k2tog, p”, for the first decrease and “*ssk, k3, k2tog, p” for the second decrease.
BUT I am no designer and in retrospect I think this would have looked much cleaner if I had done “k1, ssk, k3, k2tog, p” and “*k1, ssk, k1, k2tog, k1”. My version has very visible tiers because my decreases are at the edge of each rib, I think if I had moved the increases in by one stitch on each side it would have made a smoother transition. (I redid the decrease round several times though and couldn’t bear to frog it one more time after I landed on the I did).
Once you finish the 2nd decrease round you just pick up in pattern at round 1 and continue on. I actually started at a size medium and decreased it down to a small because I wanted the waist to be more cinched and more negative ease on the top when I was trying it on, but I think if I did it again I would have continued in my correct size and not sized down.
That’s it! Try it on constantly as you’re knitting it so you can get the right fit for your body :)
P.S. If you want to make this dress longer, I would start with wider pleats- figure out how many decrease rounds you’ll need to evenly space for your length (mine was 2 so I added 4 total stitches to the ribbing repeats). If you need 4 decrease rounds you’d add 8 stitches to the original ribbing and have 13x1 ribbing. You’d then multiply 14 by that repeat number we figured out in the first step for your size. Just keep in mind that that longer your dress is the heavier it will be. This was worsted weight cotton and at mid-thigh it’s pretty heavy and was heavy to work with!


